Wednesday, May 16, 2012

DIY Project: Centerpieces

If there was one advice that I could give brides, it would be to not pay for anything that you can do/make yourself.  Actually, the first thing I would advise is to hire a Day of Coordinator.  The second thing I would advise is to not pay for anything that you can do/make yourself! Which leads me to the first of my DIY series posts.  Hopefully, I can keep these up now that the wedding is over.

Here are some disclaimers before I begin:
First of all, I'm the type of person who likes to DIY.  It's actually enjoyable for me.  But I realize that alot of these projects aren't going to be as fun for everyone. Secondly, not all DIY projects will save you the most money.  There will always be less expensive options for invitations, seating charts, floral, etc.  But for the type things that I wanted, my projects did save me money in the end.   Lastly, uupfront planning is key.  Picture the projects in your head.  Write down the steps you need to do in order to get to the final product and make a list of tools and supplies that you'll need.  I also practiced and went through several trial and error.  I didn't decide to just do these things one day and then have them all turn out perfectly the first time around.

Still interested?  Keep on reading!

Oh wait, I do have another disclaimer =)  For the purposes of these DIY series, I'm going to be using I alot and not WE (as in my groom and I)...because let's face it, the brides usually drive details of the wedding more than the groom.  I will however give my groom alot of credit for allowing me to take on these projects and cluttering up our house.  He is OCD so this is a big deal for him.

My vision for the reception centerpieces was inspired by another bride.  After seeing her wedding pictures on facebook, I knew that I HAD TO HAVE crystal candelabras and roses for the wedding. Unfortunately, all the quotes I received for crystal candelabra rentals or purchases were just too much.  Floral quotes were even more ridiculous.  I had to figure out a way to get what I want without paying too much. 

And here's how I did it...

Candelabras:  
Luckily, another friend/bride was getting married and agreed to share the cost of purchasing candelabras.  Her wonderful fiance/now husband did some research and found a local florist that wanted to sell her candelabras to make room for new ones.  There was one down side.  The candelabras she was selling were not crystal...they were silver.  Still, I saw the picture and thought, hey I can work with that! Another tidbit about saving money is that sometimes you have to adjust your vision and know when to stop and take what you can get!  They're still gorgeous though!


This cost us $500 for 12 candelabras.  She used only 10 of them and I used 11.  They came in pieces and I assembled them about a month before the wedding with my sisters (who hated life while we were putting them together but I didn't think it was that bad =) The worst part for me was transporting them to the reception but we were able to drop it off during our final payment meeting so I didn't have to worry about them after that.

Floral Centerpieces:
I needed to make 20 small arrangements in julep cups so that I could place them underneath the candelabras (later on realized I was short two more!  Fast thinking coordinator used the bridesmaids bouquest after the ceremony =).  I also needed four larger arrangements in mercury hurricanes to go on the tables without the candelabras. I planned on making all 24 arrangements with a mixture of hydrangeas and roses.  The julep cups were purchased from the florist that made my bouquets and bouts at $5 each and I purchased mercury hurricanes at Michael's over the holiday at $7 each.

Roses - Initially, I blogged about this crazy idea to make 500 coffee filter roses which would have cost me a mere $20 but a crap load of labor hours!  You can read about it here: http://www.aktionspeakswedding.blogspot.com/2011/02/diy-project-flowers.html .
But time and laziness got the best of me and I quit after making 100 of them (Don't worry, I put the 100 in good use and will write a separate post about what I did with them).  After doing research, I decided to go ahead and buy flowers from Costco and make the arrangements myself.  I called the floral lady at Costco and had her set aside 7 bunches of 24 roses for me which I picked up Thursday afternoon before our Saturday wedding.  Although I asked for very light pink roses, the ones she set aside for me were  darker than what I wanted.  I still bought them though (note tidbit about taking what you can get =). I also saw a couple of very light pink ones on the floor and bought two bunches of those.  In total I spent $119 on roses. 

Hydrangeas - I purchased the bulk 30 stem white hydrangeas from Costco.com.  They were shipped to me early Thursday morning . Once they came in, I took them out of the box, dipped the heads in water for a second and shook off the excess, cut a little off the stem and them put them in buckets with water and flower food (oh what you learn from YouTube!)  To be honest they looked pretty sorry when they arrived but by the time I got back home from my pedi later that afternoon, they all perked up and looked amazing!  The 30 stem hydrangeas cost me $94 including shipping.
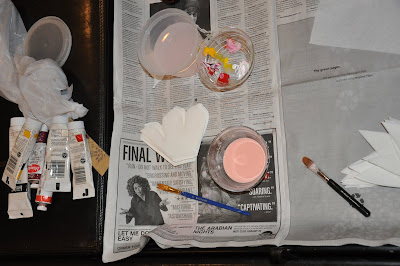
All the suplies!


One hydrangea and 4-5 roses went into each julep cup arrangements (excuse the bad lighting!).  I had lightbulb moment to "hoard" crate cup holders from starbucks so I can use them to transport the finished arrangements ::pats self on back::

Two hydrangeas and 5-6 roses went into each mercury hurricane arrangement.  I also put flora lites inside the mercury hurricanes (friend gave them to me)

                                                            Size comparison of the two different arrangements


Thursday evening, my sister and I made all the arrangements before and after dinner.  It took us approximately 2-3 hours to finish. I had way more flowers than I needed so I made two additional arrangements.  One was an all rose arrangement which went on the sweetheart table.  The other one I just left at home. 

Friday morning my groom and I took all the arrangements to the florist making our bouqets and bouttonnieres.  They stored them in their cooler and delivered to the venue on Saturday before they delivered the bouquets and bouttonnieres to the hotel. 

In total, I spent:
Candelabra + tapered candles: $300
Mint Julep Cups: $100
Mercury Hurricanes: $28
Votive Holders + Tea lights: $50?
Roses: $119
Hydrangeas: $94
Deliver: $40 (they only asked for $20 but I gave extra )
Total: $741

I had 20 tables to decorate so breakdown is $37/table.  I definitely think I saved for the type of centerpieces I wanted  =)

OK now the pictures of the centerpieces in action! (excuse the crappy I phone pics )

                                             Mercury hurricane arrangements surrounded by stemmed votives
Candelabra with white tapered candles, mint julep cup arrangements, and votives

                                                             Picture of the room


Friday, December 9, 2011

DIY Wedding Invitations - Lessons Learned

After 9 hours straight (yes, nine long hours) of working on our wedding invitations, I finally decided to call it a night. And while brushing my teeth just minutes ago, ideas popped into my head all of the sudden of how I could have done things differently in an easier and faster way. Sadly, I'm already nearing the end of this invitation making process and won't get a chance to implement my ideas. But I thought I would share it here for other brides who are also making their own invitations.


1. Mounting the Mat and Main Invitation onto the Pocket Fold

What I Did
The design of my invitations is a basic 5 x 7 Pocket Fold with a left and right panel. Both panels have an accent base mat. The left panel has the main invitation on white paper that is mounted on the top of the base mat (the main invitation measures about 1/8" smaller on each side than the base mat) The right panel of the pocket fold are the inserts. Once my invitations are mailed, I will definitely upload a picture so you can get a better idea of what I'm talking about. Anyway, when I mounted the base mat onto the left side of the pocketfold, I basically "eyeballed" the center of the panel. This was not exactly the ideal method and of course, I was never able to perfectly align it on each side. But, I am hoping that I did a decent enough job that the imperfections aren't immediately noticed. The same "eyeballing" method was used when I mounted the Main Invitation onto the base mat yielding the same inconsistent results. Also, because I was "eyeballing", it took me forever to get it just right such that the invitation would land almost perfectly in the middle of the mat base.

What I Should Have Done
When I had my "Aha!" moment, I was happy yet angry at the same time. Happy because I had finally figured out how to properly mount the paper but angry because I had already mounted all the paper I had and couldn't re-do them. Anyways, my "Aha!" moment is pretty simple and I really don't know why I hadn't thought of it sooner. What I should have done is measure from the top of the pocketfold 1/8" and then make a faint pencil mark (just a dot or something). Then, from the left side of the pocketfold, place my ruler such than it's 1/8" from the edge. All I would have to do from here is mount the base mat flush against the ruler on the left side and align the top to the pencil mark I made. Assuming that all of my paper were pre cut by professionals, the rest of the sides should have equal spacing of 1/8" from the edge of each side of the pocketfold panel. This same process would be applied for mounting the main invitation onto the base mat.

2. Design, Print, Cut

What I Did
For some reason, I found it much easier to design everything on PowerPoint. There, I was able to fit two insert panels per page (Inserts are: Main invitation, Direction insert, Accommodation insert, Reception insert, and RSVP insert). I then printed the design on an 8.5 X 11 Sheet of paper and painstakingly cut each and every sheet so that I could separate the two panels. Because I am making 150 invitations with a total of 5 inserts, that means that I cut 375 pieces of paper one by one (actually, so far only 300 sheets because I haven't cut the RSVP cards yet). I started printing this past Sunday and finished cutting paper by Wednesday which means that it took me approximately 17 hours to print and cut alone.

What I Should Have Done
The last thing I did tonight was print mailing addresses on each individual outer envelope through the top feeder of my printer. It was pretty easy and I did it through Microsoft Word. All I had to do was set the paper size to 5x7 (the size of my invites), type in the name and address in the middle of the page and print. I suppose the repetitive nature of the task finally beat it into my head that I really should have gotten my paper pre-cut at any office supply store. They can cut up to 100 sheets at a time in a matter of seconds and it only cost $1.50-$2 per cut (not per sheet of paper). Similar to what I did with the envelopes, I should have typed my design on Word with the page setting set on custom sized paper (just indicate what size I had my paper cut) and then fed the pre-cut paper through the top feeder of my printer. I anticipate that changing the process from Design in Power Point - Print - Cut to Design in Word - Cut - Print would have probably saved me 12 hours.

Despite the tedious work, I'm happy to report that the invitations are coming along really well. Hopefully, I can implement these ideas for some of my other friend's future weddings (if they choose to go the DIY route....which I hope they will ; ).

Pictures coming soon!

Monday, December 5, 2011

Prepare for Marriage

This past November, Joe and I celebrated our 6 year anniversary and for the most part, we've always felt like we already know everything there is to know about each other. What else is there to know? I know the look he gets when he's day dreaming in the car. I can tell exactly what he ate from the smell of his poo. And from the slightest change in the tone of his voice, I can tell if he's lied to me about something.

So as most brides, I've focused mainly on what needs to be done for the big day and little time getting to know my husband to be.

It was no surprise that I waited until the last minute to figure out how we would meet our Pre-Cana requirement to be married in the Catholic Church. We figured that with Joe's work schedule, it would be nearly impossible to make multiple trips to meet with our priest. Engaged Encounter weekend was our only option. Engaged Encounter is basically Pre-Cana compressed in one weekend. It's a retreat where you and your fiance discuss topics that really should be discussed before committing to a lifelong partnership. Topics range from how you will handle money as a married couple (by the way this is the #1reason people divorce!) to better communication skills. It's therapy - sponsored by the Catholic Church.

None of the topics discussed during the weekend were new to us. The main difference was that our conversations about them in the past were in passing. Typically, we would be faced with some challenge - money for example - of how we would split a certain expense - and that's when we'd talk about how we should handle money going forward. The Engaged Encounter setting forces you to talk about these topics and nothing else. There's not television in the background...there isn't someplace else you need to be.

Aside from committing the time to get to know each other better, the biggest benefit we got out of this was our general attitude toward our "trigger points". You know, the things that really irk people about each other. After a certain amount of years together, there are certain words or sentences...innocent as they may be...that could trigger crazy amounts of irritation. For Joe, it's probably my almost nightly request for a glass of water when he's already tucked himself comfortably in bed...and for me, it's the tone of his voice when I call him at work (because a customer pissed him off and I'm on the receiving end of the frustration). So back to what we learned about this (also applicable to alot of other situation), was surprisingly simple - "Decide to love".

{commence puking and sarcastic remarks from the audience}

Yes, the answer is simply to decide to love. Getting ready to get that last word in an argument and really stick it to them by bringing back some old issue? Decide to love instead and keep your mouth shut. Let the laundry sit there because you don't really care if it's folded or not? Decide to love instead and just fold the damn pile because you know that for some odd reason, it makes him crazy happy that you would.

We decide our emotions. We decide our actions.

Decide to love.

Wedding planning can be crazy. Almost every weekend on our calendars are already spoken for. But you have to set aside some time to prepare for marriage. For us, we sacrificed an already planned family vacation because it was literally the only weekend we could go. It was worth every penny ($350 for the weekend including meals for the both of us) and for you non-Catholic folks, you don't even have to be Catholic to go.

This is probably going to be the cheapest thing you'll spend in preparation for the wedding...but it's going to be the most worth while.

Wednesday, September 28, 2011

Budget Advice: Make a List and Be on the Look Out

Most of us are on a budget especially when it comes to weddings where most everything is marked up. Therefore, it's important to be on the lookout for things that you need to buy, even if you think that it's still a little early, because you might miss out on a deal.


When you start planning, make a list of things that you know you'll need to buy. Even if it's just a general one, it's good to keep a list handy (I'm a dork so I still carry around a filofax and keep my list there) so that when a good sale comes up, you can quickly look if the sale might fulfill any of your must buy items.


Some of the things on my list which I've found deals on are:


Wedding dress - Well, we all know what happened with my wedding dress shopping "situation". I went a little crazy and ended up with multiple dresses. Luckily, they were all deals while keeping an eye out for sample sales and I didn't do too much damage to my wallet. You can read about it here and even after that trip, I did actually end up buying two more which are the two that I will be wearing (one for the ceremony and one for the reception). In total, my wedding dress purchases total $1500...but retails for well over $8000.


Bridesmaid dress - From the get go, I knew I wanted my bridesmaids to wear long black dresses. You'd think it was easy to find long black dresses right? I have to admit, it was a little too easy and this is when I had to learn my lesson of buying too many wedding dresses to be a bit pickier with my bridesmaids dresses. A couple of deals came and went and at times I thought I passed up a good thing - Like this dress from jcrew (in black) that was on sale for $200 from almost $500 full price.


But at that price point, it still didn't seem like a deal. A few more visits to jcrew's website when they e-mailed me about sales and I finally took the plunge with classic silk chiffon dresses for $100 (orig. $350). I was able to snag the remainder of their stock which were all luckily in my bridesmaid's sizes.


Flower girl dress
A month ago, I was really sad to hear that Priscilla of Boston was closing. I spent many crazy hours there during their sample sales and was looking to someday be able to take my friends when it's their turn to shop for their dresses. However, store closing = closeout sale and leave it to me to come up with an excuse to go...partly to see what I could find to cross out something on my "list" but mainly so I could take a peek at the wedding dresses on sale =). Keeping my focus (after porousing through EVERY wedding dress they had), I headed straight for the bridal party section and found the cutest blush pink dress with a tulle skirt for our two flower girls. The store only had one (luckily in my flower girl's size by the time the wedding comes around) but another store was willing to ship an identical dress to me. The dresses ended up costing $25 each so I didn't mind paying the extra $10 shipping cost for the second dress. The dress can still be found at Nordstrom for $150:


I've found a few more great items at a great deal by simply keeping a list on hand when a sale comes up like a picture card box that I purchased for my friend's bridal shower (I also got one for our wedding) on the sale for half price at http://www.theperfectcardbox.com/. I also found my bridesmaids presents at a great deal but I don't want to divulge since I haven't given it to them.


All of these things are typically "last minute" purchases for weddings but if you're on a tight budget but don't want to sacrifice the nicer things in life, spacing your purchases and keeping an eye out for deals is the way to go.


I hope you guys don't think I'm too cheap.


Ok, I AM cheap ; )


Happy shopping!


Wednesday, July 20, 2011

The Second Funnest Thing About Planning a Wedding - The Bachelorette Party

Blessed with amazingly fun sisters and girlfriends I've gotten a chance to go on some really great destination bachelorette parties without breaking the bank. While planning for my friend's bachelorette this upcoming summer (tomorrow actually!), I thought it might be a good idea (plus an excuse to reminisce) about two destination parties I've had the honor of attending. Hopefully, this will help a first-time bridesmaid plan one

1. St. Thomas, USVI

In 2009, 11 of us girls spent four days at the Frenchman's Reef and Morningstar Bay in St. Thomas. We booked two units by the beach and I remember paying some ridiculously cheap rate at less than $100/person for our stay. As luck would have it, one of the bridesmaid knew someone who worked for Marriott and was able to get us an employee rate for the rooms. Still, when I was researching units at the newly built Marriott timeshare right next to this resort, I found two-bedroom units renting at $250/night which would have been comparable to what we spent back then.


[aerial view of the hotel]

I know that St. Thomas isn't necessarily one of those places you immediately think of when planning for a bachelorette because it is a beach town and you're suppose to just relax and do nothing. But surprisingly, we always ended up at a fun bar/club every night we were there. Cab drivers were always friendly and trustworthy, and we were never short of things to do.


[at a local bar near the hotel]

During one of the days, the group decided to take the ferry to St. John to see Trunk Bay...and I would have to say that I've never seen a more beautiful beach than that.

[beautiful Trunk Bay]

In all, I anticipated that each person spent about $400 on hotel and airfare. I actually spent even less than that because I used frequent flier miles which made my flight free! I ended up booking it last minute and was able to use just 25,000 US Airways points for my round trip flight.
Last bit of money saving advice, we purchased bottles of alcohol at duty free while we were still on the aplane. We did alot of pregaming so that we wouldn't spend so much money at the bars. One of the girls also met a chef during one of our nights out and he offered to cook us dinner at his restaurant one night. Lastly, with the bride's savvy bargaining skills, she was able to convince the manager to give each one of us girls one free meal per day at either the breakfast buffet or the beachfront restaurant. Yes, we worked hard for our food =) Good times!

2. Playa del Carmen, Mexico

Playa del Carmen is one of those places that I wouldn't mind going to every year. It's such a versatile destination that would be good for a romantic getaway, family vacation, and yes, even a bachelorette party! Because I had previously visited, it made it a bit easier for me to plan my older sister's bachelorette party last year and again for my friend's bachelorette party this year. Gee, can you tell that I really like PdC??

In 2010, booking our flight was super easy. I found a deal on AirMexicana (since bankrupt) that cost each person only $297 each round trip. In terms of accommodations, we booked a three bedroom beachfront condo that cost each person $133 for the 4 days that we were there. For the eight girls that went, the condo was plenty big for everyone. A huge plus was that the condo was literally ON the beach - meaning you open the patio door and your first step is sand. You can book it here: http://aquazulplaya.com/ (we booked Ocean Plaza 3)

[view as soon as you open the patio door]
The location of this condo was perfect. Out on the beach was a beachfront massage place which according to my friend only cost $25/hr. I'm still kicking myself for not getting a massage there but you better believe that I'm going to get one everyday next time I go! One block from our condo was "club row". Alot of the bars and clubs were located there and we frequented Blue Parrot which was a beachfront bar/club. Ok, frequented means we went there EVERY night! It was just so much fun and the music was great that we didn't feel the need to go anywhere else. Although we did try other places, we always ended the night there.

For some daytime fun an adventure, we also booked an all day tour zip lining, cliff jumping, and cave snorkeling with a company called Edventure (http://www.edventure.org/). We opted for a shorter version of the tour they offer and paid $80/person including transportation. It was definitely one of the highlights of the trip and we all got to do something we would never do... like zip lining upside down!

[Yup, it's as fun as it looks!]

[walking around the cute streets of PdC]
To save money on drinks, we walked to a local convenient store and bought rum and juice there. The condo came with a blender and we made our own blended drinks for the beach everyday. The food was pretty inexpensive as well. We did have one dinner on the expensive side but otherwise, we ordered pizza or went to a well known taco place that was really cheap. In total, each person spent $540 which includes airfare, accommodations, airport transportation, and the all day excursion.

So that's it for now! Next recap: last year's Bachelorette party to New Orleans and the one I'm going to tomorrow back in Playa del Carmen =)

Sunday, February 6, 2011

DIY Project: Flowers

When we put together our wedding budget last year, we estimated a certain amount that we could spend on floral arrangements, bouquets, and anything flower related. Flowers wasn't even something that I thought I needed to address until much later on the planning process so I started focusing on other things that needed more immediate attention. However, while sifting through wedding forums like theknot, I quickly realized that we REALLY under-budgeted for a florist. Alot of the forum posts commented that a $3k florist quotes were "reasonable"and "cheap" to which I responded with (to myself of course), F-THAT! I mean really? $3k on flowers that will wilt within a few days??

So I started researching other options...took some trips to Michaels and went online to see how much "fake" flower arrangements would cost me. Surprisingly, those weren't that affordable either costing up to $6 PER fake rose....to which I responded, F-THAT too!

I considered forgoing florals (at least for centerpieces) all together and looked into options like crystal candelabras and manzanita tree centerpieces.
So pretty right??

And even though I've finally settled on having a non-floral centerpiece (which will be another post), the table-scape just didn't seem complete without any.

Then came Martha Stewart...or rather, her website which provided me with a tutorial for DIY roses made out of coffee filters. I figured it wouldn't hurt to at least give it a try and see how fast I could make one because I estimated that I would need about 500 roses total.

Progression of the project...

First, Martha tells you to cut up 8 different types of petals. At first try, I followed the directions to a tee and did just that. But I eventually figured out that I could use just three types of petals to yield the same looking rose.

Picture of my first few flowers before and after I painted it.

Martha also tells you to paint each petal after you've already assembled one rose. This was pretty annoying so I decided to paint all my petals beforehand.

I finally put my old acrylic set to use which I had to dig out at the very back of our storage. Sad...

All the little petals drying after painting...

And here's a bunch more of the final product...

I'm not 100% sure that I should really invest the time and effort into making 500 of these. To be perfectly honest, it was a bit tedious to cut so many petals, paint them and then assemble them into a rose....but at the cost of close to nothing and the fact that my wedding is still a year and a half away, it's hard to not give this idea a serious thought.

Total cost approx breakdown for 500 roses:
Coffee Filters: $50
Floral Wire: $17
Floral Tape: $5
Painting tools: Free
Labor: $10000000000000000000000000000000000 =)

Tuesday, December 28, 2010

First DIY Project: Invitations!

My first attempt at breaking the robot in me was to get back in touch with my crafty/artsy side by practicing how to emboss for my future invitations. Sad as it may sound, I haven't felt this excited since high school when things like going to art lessonsand making home-made cards were what I looked forward to doing most after school.

Sitting in my parent's dining room, I opened up all the goodies I purchased right before the snow storm, which included some plain invitations, stamps, clear ink, embossing powder, and an embossing heating tool.

My goal was to at least learn how to emboss so that sometime next year, I can make my invitations to look somewhat like these (from the weddingbee):


At first attempt, I practiced embossing initials because I wanted to incorporate our initials on the outside of our pocketfolds. I got a little excited and actually ended up embossing these upside down on the first two cards. Really, I was THAT excited! At the third attempt, I finally got this:


For the inside, I practiced embossing a pattern with some of the stamps I found. For the actual invite, I'm having a pretty hard time finding a stamp with a pattern that I really like (i.e. the exact ones from the weddingbee inspiration). At least for practice, I ended up with this:


So you're probably wondering - Is it really worth all the effort to do your own invitations? As I expressed frustration in messing up my first two trials, I could see my family (who thought I was crazy for doing all this), ask themselves this very question. Through online research, I actually found that I could probably have invitations (which would I be perfectly happy with) professionally made for fairly cheap - maybe even cheaper than what it would cost for me to do it myself.

What makes it worth it for me is the prospect of creating again - to experience that joy and sense of accomplishment of starting from scratch and then see your final product come to life. I'm sure my patience will be tested. I'm sure that at some point during this process, I'll want to give up and just order the invites online. Still, I have a smile on my face just thinking about the work it will take to get all of this done and that's just something you can't put a price tag on.

The mess I made at my parent's house:

To my neat freak fiance - "I'm sorry" in advance!